Wednesday, February 25, 2009

Spoiler Alert

So, I don't know if you could tell from the pictures in my Valentine's Day post, but you can draw on the tables at Jax. Of course we drew all over them....we couldn't help it!


I was thinking that maybe he would see this and come out and introduce himself.

When he did come out and talk to us, I asked him "So did you win top chef?!" but he just laughed. I mean, obvi he couldn't tell me, but he wasn't giving me any hints either!!! Ah, well in case we was wondering, I was rooting for him!


By the way, that "cow sitting" is supposed to be the United States...

I was a little disappointed with the finale of Top Chef, but mostly because of how Carla performed. While I am definitely happy with the outcome, I wish she would have been "true to herself" instead of listening to Casey. It would have been more interesting if there were actually three contenders for the title of Top Chef. Ahhh, but I will leave any additional commentary for Alex, since she is much better at it (of course, if she even chooses to comment. You might not be so lucky).

Oh, and in case you missed it....we have a picture with the TOP CHEF =) eee! yayay Hosea!

Sunday, February 22, 2009

Recipes #6, #7: Chicken Parmesan & Zucchini with Parmesan

Earlier today, I decided that I wanted to make dinner, since I rarely have time during the week. Ryan's mom bought me two cookbooks for Christmas: Giada's Kitchen: New Italian Favorites and Barefoot Contessa Family Style. Those of you reading this probably know about my obsession with Giada (and Lisa's obsession with Barefoot Contessa, haha). Well, I decided to try something semi-new, and go with Ina Garten for tonight's dinner.

The zucchini with parmesan was taken directly from the Barefoot Contessa cookbook. Here's what you need:

8 medium zucchini
Good olive oil
2 large yellow onions
Salt and pepper
1/2 cup freshly grated Parmesan cheese

First, cut the onions and zucchini. For the zucchini, cut them lengthwise, and then cut smaller pieces, like this:


Next, heat up 2 tablespoons of olive oil in a large pan and add the onions. I'm going to confess....I cut up the first onion and saw how much there was, and decided to only use one. I'm slowly learning to like (cooked) onions, so I didn't want to overdo it. And after I was all done, I was quite glad I didn't add that second onion. Anyway, you want to cook these for at least 10 minutes on medium-low heat, until they start to brown. Another confession: I cooked them for about 20 minutes. I wanted to make sure they were completely cooked. But if you aren't like me and don't need your onions to be 100% tender, then 10 minutes should be just fine!

After the 10 (or 20) minutes are up, add half of the zucchini, 1 tsp of salt and 1/4 tsp of pepper. Toss occasionally for 10-15 minutes. I ended up adding all of the zucchini, since I didn't want to deal with the two batches. The reasoning behind two separate batches is because they end up more "steamed" then "sauteed"....oh well, whatevs!


After the veggies have been cooking for the 10-15 minutes, add in the parmesan cheese and cook for an additional 30 seconds. Now, ideally, I think the cheese is kind of supposed to brown the veggies, but this didn't exactly happen. Oops. Maybe because I added too much olive oil (I'm convinced I did, because I didn't use two onions....the whole time it just kind of seemed like there was too much) or maybe because I ignored the recommendation to cook the zucchini in two separate batches. Oh well! The parmesan cheese (oh, and of course I added more than 1/2 cup, since I'm cheese-obsessed) ended up melting, instead of browning anything. But it was okay because they tasted yummy! Here's the end result:


So now onto the main dish! I've made this chicken parmesan a few times before. It's a recipe that oringated from Ina Garten, but Ryan's mom taught me how to finish the dish a little differently, which is the way I did it tonight. Here's what you're going to need:

6 skinless boneless chicken breasts (I always just buy the 4 pack from Foster Farms)
1 cup all-purpose flour
1 teaspoon kosher salt
1/2 teaspoon pepper
2 eggs
1 1/4 cups seasoned dry bread crumbs
1/2 freshly grated parmesan cheese (ok...I just use the kraft stuff for this)
unsalted butter
good olive oil
mozzarella cheese
Prego traditional tomato sauce

You start out the same as my last recipe, where you take the chicken breasts and cut off the fat and pound them until they are about 1/4 inch thick.

In case you're curious, here's the tool I use for pounding.

I swear that's the toughest part of this recipe. Next, you take out two plates and a bowl. On the first plate, mix the flour, salt and pepper. In the bowl, beat the eggs with a tablespoon of water. On the second plate, mix the breadcrumbs and parmesan cheese. Then, you take each chicken breast, coat it in the flour, dunk it in the egg mixture (make sure it gets everywhere) and then cover it all over with the bread crumb-cheese mixture.

After coating the chicken breasts.

After that's done, heat up 1 tablespoon of butter and 1 tablespoon of olive oil into a large pan. Cook each chicken breat for a few minutes on medium-low heat. I probably let them cook for about 4 minutes on each side, but of course it depends how thick they are.

When I first put them into the pan.

After flipping them over. Yum, nice and brown!

I cut the chicken breasts in half, so I ended up with 8 altogether. Therefore, I did them in two batches when I first cooked them. Once all of them are cooked and transferred to a plate, pour some of the Prego sauce into the same pan. But be careful! It may spray up at you...

Anyway, when I normally make this, there is always pasta. But for some reason, I chose not to make pasta tonight. So usually the extra sauce left over in the pan is mixed in with the pasta. You can just pour as much sauce into the pan as you think you need to coat the chicken and mix in with the pasta. I let the sauce heat up for a few minutes, and then placed the 8 chicken breasts into the sauce.


For this part, don't worry too much if the chicken breasts are kind of on top of each other. It's not as important for them to have their own space since they are already fully cooked. Unfortunately I don't have any more pictures to show, but the next step is to add the grated mozzarella cheese on top of each breast, and leave them in the pan (covered) until the cheese melts. And then it's ready to serve! Enjoy =)

Saturday, February 21, 2009

Blue and Green and Teal =)

So it took a while, but here's Alex's board! Yay! My original idea was to do an all teal board, but I looked around for teal pictures and was pretty unsuccessful. So, I ended up with a mix of blue, green, and teal. How pretty =)

[1][2]
[3][4][5]
[6][7]

Oops...so I've been trying to be good about getting my sources up there, but I can't seem to find two of the pictures anymore! Ahhh! If you are randomly on google images, let me know if you see pictures #3 and #4. 

Ok, sweet, enjoy! I'm going to try to be better about posting, so hopefully there will be more inspiration boards and yummy food and pretty scrapbooking pages to come!

Thursday, February 19, 2009

Valentine's Day <3

When Ryan and I figured out we'd be in Colorado on Valentine's Day, our first choice for dinner was Jax Fish House in Boulder. I had been there 3 times before because they have an amazing happy hour deal with their oysters! YUM!

My interpretation of the Jax logo


The real logo (but I think mine's better!)

We were really looking forward to eating tons and tons of oysters, but when we went online to make reservations, we noticed that they actually had a fixed menu for Valentine's Day. Well, the menu looked really good, and it is Hosea's restaurant...so we decided that we should go anyway!

Yum! Everything sounded so good. It was hard to decide...


Lucky for us, the first dish was already chosen: Oysters and Pearls! (Lucky because it was going to be so hard to choose everything else!) This amuse was amazing! The "pearls" were different types of caviar, and it was seriously so good. I wish I had paid more attention to what they actually put on top...

The second course was an easy choice for me and Ryan. It was between the sashimi platter for 2 or the tempura platter for 2. Well, of course I love anything fried, but raw food is definitely my favorite! When this course came out, I was so glad we made this choice.

The platter was much larger than I expected it to be!

Ah, the third course. We had two choices, and we ended up choosing the same one. The salad with the goat cheese, asparagus, and almond sounded great, but it came with an orange vinaigrette, and I am not the biggest fan of sweet dressings. But looking back, I'm sure it would have been amazing. Another factor for me was the fact that I was starting to feel a little sick (sore throat), so the crab, porcini, and cauliflower bisque won me over (and I guess it won Ryan over, as well)! I'm so glad I chose the bisque...the flavor was wonderful!

Can you see the crab? Soooo good! This definitely hit the spot.

The fourth course is where I really had a hard time choosing. Everything sounded so good! I'm not surprised that Ryan ended up picking the filet mignon. I had a rather difficult time choosing between the other three options, but ended up ordering the crab and lobster raviolis, because I'm a pasta person. I tried Ryan's dish, and was surprised by how much I liked it! It's something I would probably never order, but it was VERY good, and it's the first time I thought that maybe I could order something like that AND be satisfied. But, I am really glad I chose the raviolis.

Oh, and did I mention that we both decided to do the wine pairing? We didn't realize that we were going to get a full glass of wine with each course! What a pleasant surprise =) Unfortunately I didn't get pictures of each course with the wine, but Ryan's glass snuck into the above picture.


The red pepper sauce was delicious. And the lobster....yummm.


The three dessert choices were chocolate bliss, strawberries and champagne, and fruit and cheese. This was actually a difficult choice, and we kept going back and forth. The strawberries and champagne was such an appealing choice to me because it screamed "Valentine's Day!" But then again, I am a sucker for cheese, and thought it would be the perfect ending to our wonderful meal. However, in the end, we chose the chocolate bliss. This was mainly because they described what was included, and we decided that we don't eat chocolate too often, so we should treat ourselves. Oh, and it was a treat!


Truffles, ice cream, cookies, brownies, pudding, etc. Pure chocolate bliss!

I was very satisfied with our meal! The food was seriously so good! I can't wait to go back to Jax next time I'm in town. If you are ever in the area, definitely stop by for happy hour! Other than the Valentine's Day dinner, I had only really had drinks and oysters from Jax, so I'm not really sure what the "everyday" entrees are like, but if they are ANYTHING like the meal we had, it will be amazing!

Oh...and our second dessert course? Meeting and taking a picture with Hosea, of course =)

Jealous? I would be too!

Tuesday, February 17, 2009

Michka's Board

I had a few ideas for Michka's board, but ultimately decided on the one I chose because of an outfit I wore to work last Friday! We've often discussed our favorite outfits, including color combos that we found appealing. So on Friday, I wore a pale yellow button up shirt and my long gray coat from Banana. Oh, and of course I wore my gray Steve Madden peep toes! Whenever I wear a combination of yellow and gray, it reminds me of a conversation Mich and I had when I first started working. It was the day we went to the driving range (and Steve, obvi, brought a friend!) and I was wearing my dark gray pants with the same pale yellow shirt I wore last Friday. And we discussed how well yellow and gray worked together!

So, in case you haven't picked up on it, Mich's board has yellow and gray! I think it turned out well...what do you think?

[1][2][3]
[4][5][6]
[7][8]

Well, I've always kind of thought about another color that I wanted to throw into this particular mix. It originated, once again, from my closet. I have these red shoes that I love, and I actually almost wore them on Friday. So, here is Mich's USC themed board, with a splash of red thrown into it!


[1][2][3]
[4][5]
[6][7]

I don't think the second board turned out the way I wanted to, so don't be surprised if I try it out again sometime in the future. In the meantime, enjoy! I definitely have more color combos that I will be trying, but if there is anything in particular you would like to see, lemme know =)

Wednesday, February 11, 2009

Recipes #4, #5: Blue Cheese Brussels Sprouts & Chicken Piccata

So the other night, Carlee and I decided to make dinner for my mom and sister. My mom LOVES brussels sprouts, as well as blue cheese (and so do I). I was super excited to learn how to make these wonderful vegetables! I have another brussels sprout recipe, which I'm sure I will be sharing soon enough....


Before I go into the brussels sprouts, I'll start with the chicken piccata. The recipe is from, surprise surprise, Giada de Laurentiis. It's very simple to make! I bought the Foster Farms skinless, boneless chicken breasts (comes with 4 in a pack), and de-fatted them. I'm not sure what the technical word for that is....but essentially, I told the knife, and cut off any white areas or red bloody areas. Luckily, these breasts didn't have much. Then, I pounded them out, and cut them all in half. I took a picture of the ready-to-be-coated cutlets, but it looked too gross, so I've decided to keep it to myself!


Next, put salt and pepper on them, and lightly coat them with flour. In a pan, put 2 Tbsp butter and 2 Tbsp olive oil. Once it starts to get hot, place the chicken in the pan, and cook for about 3 or 4 minutes on each side. The thinner you pound them, the quicker they cook!

Once they're done, put them on a plate, but don't dump out the extra butter and oil. In the pan, put about 1/3-1/2 cup of lemon juice (for me it was the juice from 2 lemons), 1/2-3/4 cup chicken broth, and 1/4 cup of capers (but I put in the entire jar). Let that come to a boil, and throw the chicken back in, and let it simmer for about 5 minutes. YUM.


There they are, ready to be served! If you make pasta, the extra sauce can be used for that =)

For the Blue Cheese Brussels Sprouts*, all you need is:

4-5 shallots
2 cloves of garlic
red pepper flakes
1 Tbsp olive oil
brussels sprouts (we used maybe 1 pound?)
salt and pepper to taste
blue cheese
*recipe is stolen from Carlee...thanks!

Start off by cutting the brussels sprouts in half, and place them in a pot of boiling water for a few minutes. Once they've had a chance to cook, drain them, and put them in an "ice bath" or you can just place them in the freezer (to stop them from cooking anymore!). In the meantime, heat up 1 Tbsp of olive oil, and place the sliced shallots in the pan. We cooked these for a long time...until they were nice 'n brown!! Oh, and don't forget to add in the red pepper flakes! yummm

Look at those yummy sprouts!


The shallots stayed in the pan for probably 15-20 minutes.
They got super tender and were sooo good!

After the shallots have been browned to perfection, toss in the brussels sprouts and the garlic. We cooked these for another 15 minutes, at least. Make sure the brussels sprouts get tender, but not too mushy! They should have a nice golden brown color to them when they are finished.


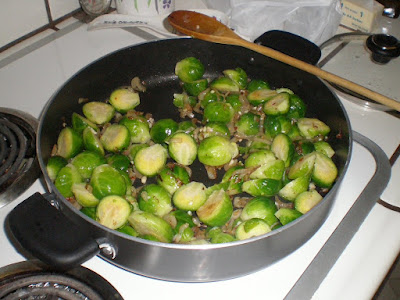
Here's a picture before they were completely done, but you get the idea!

Unfortunately I failed to get a picture of the final product. I think I was just too excited to dig in! The brussels sprouts were amazing, and I will definitely be making these again. Oh, so at the very end, we ended up serving ourselves a portion of the sprouts, and then added as much blue cheese as we wanted. It melted and was wonderful with the brussels sprouts!

Wednesday, February 4, 2009

Winter!

So, it's been a while since my last post, and it's definitely been a LONG while since my last inspiration board. Why? Well, the program I was using, found here, was fast and easy. But, the last few boards I tried to make came out as blank spaces. I guess that certain pictures don't show up because they are protected, and well, mine weren't showing up! Therefore, I knew what I had to do: turn to Photoshop! But I was (am) scared, because I'm not too Photoshop-savvy, AND I know what a timesink it can be!

But, I decided to give it a try. I've been thinking of these colors lately....I've always loved them! They remind me a bit of snow and winter, so this is my first winter inspiration!
[1][2][3]
[4][5][6]
[7][8]

Now that I've done my first inspiration board on my own, using PS....expect a lot more!